|
Membership sites are great way to make money online. Your monthly revenues will increase every time a new member subscribes to your site. Let Memberkit handle the hard parts such as collecting payments and protecting member area pages. So that, you can focus on creating an excellent content and service for your members.
Memberkit has integration with many payment gateways such as Paypal, GoogleCheckout, WorldPay, 2CheckOut, ClickBank and OneBip.
You can easily collect recurring subscription or one-time payments from your members.
Memberkit has advanced subscription features to collect recurring or one-time payments from your members. Recurring payments are
only available on PayPal, 2CheckOut and OneBip. The most advanced integration is with PayPal subscriptions.
PayPal subscriptions have many great features that makes it perfect for any membership site. Therefore, if you are planning to
collect recurring subscription payments, we strongly recommend using PayPal option. If you are only planning to collect one time
payments you can use any of the payment gateways provided. This tutorial assumes you will be using PayPal for your subscription
payments.
Example Cases:
Here are some scenarios on how you can use Memberkit's payment features:
Collect monthly subscription payments to allow users to access member-only pages in your site,
Collect membership dues for your organization,
Sell your products online,
Collect one-time payments from users to allow a feature on your site,
Collect donations from your members or visitors,
Provide paid newsletters to your visitors.
Let's see how we can accomplish a simple subscription based membership site:
1. Setting up payment integration on your sign up form
First, open your Memberkit Admin screen and click on the "Applications" panel on the left side.
You will see a list of applications. Since we will be adding this subscription to membership sign-up page,
we will add it to the "Members" application "Profile" form. Double click on the profile form to open the form builder.
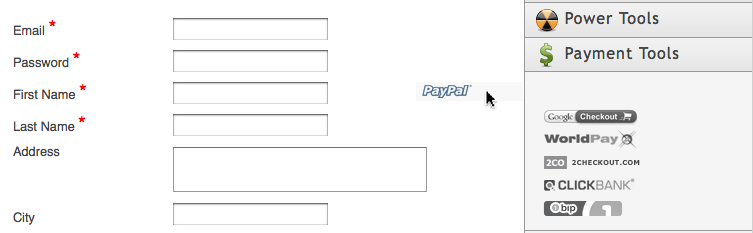
On the right side of your form builder, you will see a "Payment Tools" toolbox. When you open that,
you will see several payment gateways available for integration. Grab the PayPal logo and drag it into
your form. PayPal Integration Wizard should automatically show up.
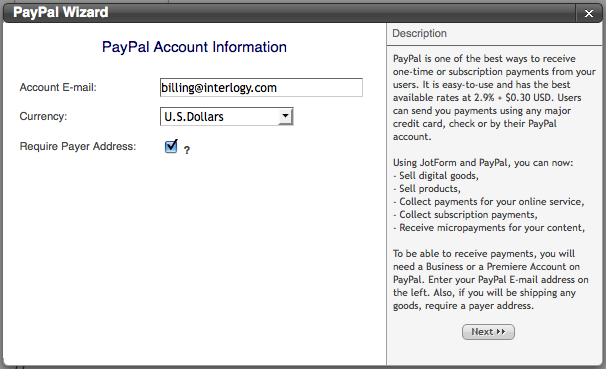
On the first page of the wizard, enter your PayPal account email address and choose the currency you
will collect payments in. You will also see a checkbox that can be checked if you would like to collect
payer addresses with payments.
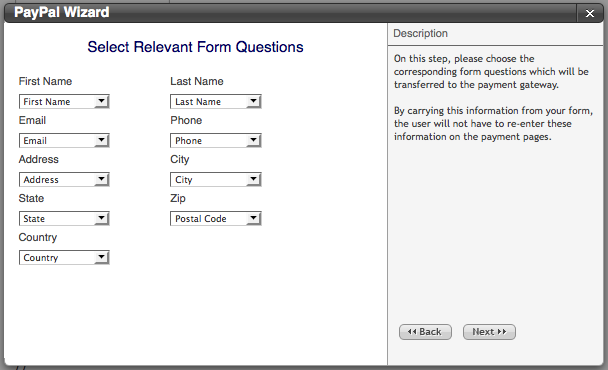
On the next page, you do not need to change anything unless you have changed the default questions for
the address fields. These information are sent to PayPal so that the user will not have to re-enter the
same data she entered on the sign-up page.
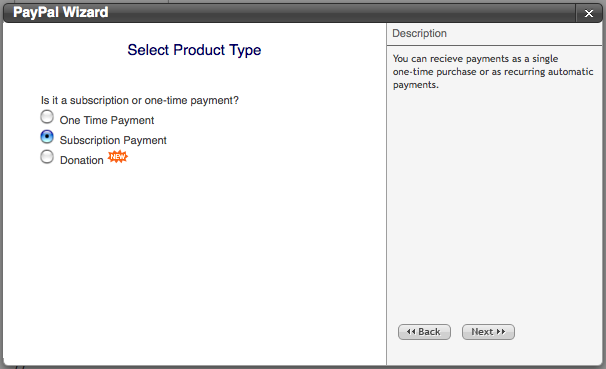
Then, on the next screen, you will choose your payment type. Since we are creating monthly recurring payments,
select "Subscription Payment" option. Depending on your requirements, you can also select One Time or Donation
options. These selections will define the next steps you will see on the Payment Wizard. Let's go ahead with the
"Subscription" option.
The next step is to choose exactly what kind of options the user will have on the sign up page.

1. If you choose "Single Subscription" option, the user will not see payment options on the sign up page.
She will simply complete the registration form and be redirected to PayPal payment page. If your member area
will only be available to paid users, you should select this option.
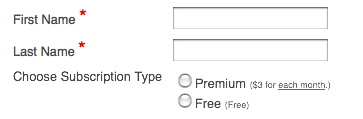
2. If you would like to let users choose one of the many subscription types on your sign-up page, choose
the second option "Single Subscription with Multiple Choices". You should also use this option, if you would
like to have both paid and free users at the same time on your member area. Another important use of this
option is to have different time periods for your subscriptions. For example, you can have monthly and
yearly payment options with different pricing. Since this is the most commonly used option, we will continue
with this selection in our tutorial.
3. If you would like to let users choose one or many subscription types, then you can choose the third option
"Multiple Subscriptions". This is very useful if you have a subscription type but would like to up-sell additional features.
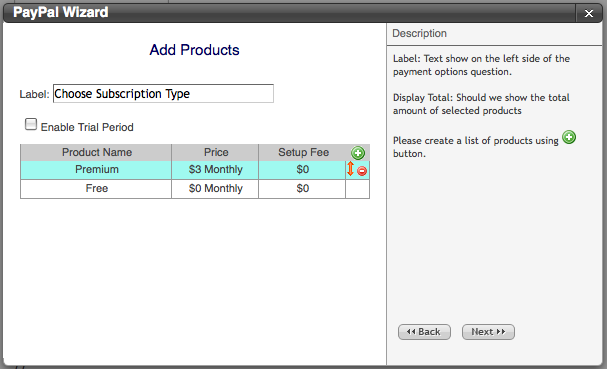
We will then enter details for our subscription types on the next screen. Simply click on the (+) plus icon to
add new products. Note that "Product" and "Subscription" words are used interchangeable on this wizard.
Define product name, pricing, payment period and setup fee for your subscription. If you would like to allow free
members, add a $0 subscription type.
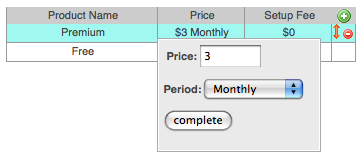
For example, if you will have a $9/month "Premium" subscription with $19 initial payment, set "Product Name" to "Premium",
"Price" to "$9 Monthly" and setup fee to "$10". Setup fee will be a one-time only payment on membership sign-up.
If you would like to allow free trial period, click on the checkbox button and set the trial period. For example,
you can set it to "30 days" and users will not be charged on sign-up, but will be automatically charged after the first month.
Once you complete the wizard, click on "Save" button on the form builder and then click on "Publish" button to launch
your new sign-up form. You can then click on "visit site" link to test your sign-up payment integration.
2. Setting up paid features and pages on your site
When a user completes the payment, Memberkit will automatically set user's account type to the subscription type selected.
You can then use the Account Type to enable/disable various pages and features on your members section. Let's see how you
can do this with an example.
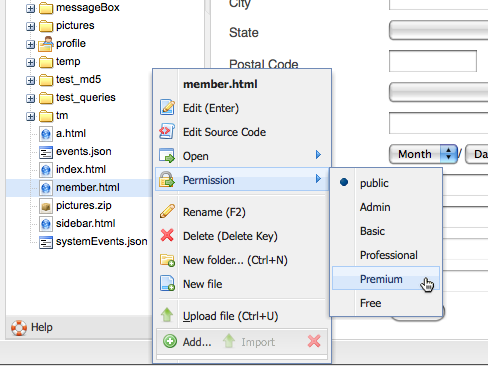
Let's say you would like to only allow Premium users to send internal messages to other members. Internal messaging is
handled by "messageBox" default application that comes with Memberkit. You would want to check if the user is Premium
on the messageBox compose message page and if the user is not a premium member, ask them to upgrade right there.
To do this, open the "File Manager" panel on the left side and right click on the "message.html" file. You will see a
"Permissions" option on the menu. Simply select "Premium" option. Then publish your site. That's pretty much all you
need to do to disable access to that page for non-Premium members.
The next step would be to show an upgrade form on the error page. To do that, double click on the "permission_failed.html"
file under "profile" folder, and add this tag to the page:
{UPDATEFIELD:profile:chooseSubscription}
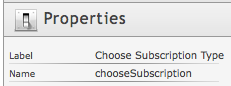 Note that "chooseSubscription" can be different for you. To find out the field name for your subscription question,
open the profile form on the Application Manager panel, click on the payment question on the form and copy the "Name"
field on the properties box.
Note that "chooseSubscription" can be different for you. To find out the field name for your subscription question,
open the profile form on the Application Manager panel, click on the payment question on the form and copy the "Name"
field on the properties box.
You can also do more advanced things using the "System Events" feature. You can open the System Events from the
"Menu" dropdown on the "Application Manager" panel. For example, if you have designed a new layout for paid users,
you can setup a system event which will use that layout instead of the default design.
3. Reports
To browse and manually add/update/delete subscriptions, you can use the payment reports section on the admin site.
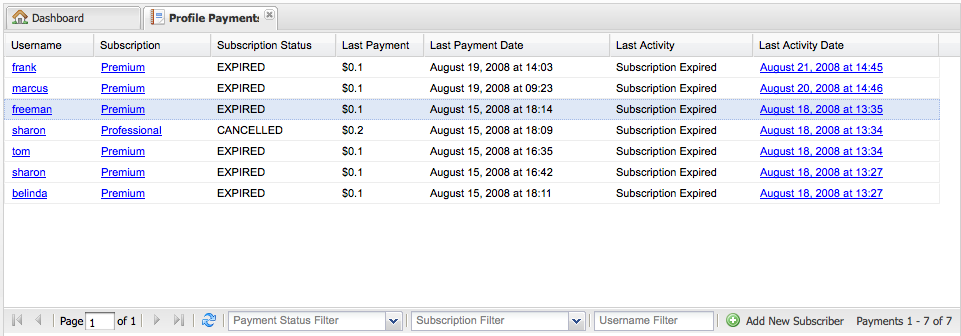
Open the "Content Manager" panel on the left side, and click "Members" application. You will see a "Profile Payments"
item. Double click on that to open payment reports. This item only shows up if there is a payment question on the form.
The payments grid consists of these fields:
Username
Subscription
Subscription Status
Last Payment
Last Payment Date
Last Activity
Last Activity Date
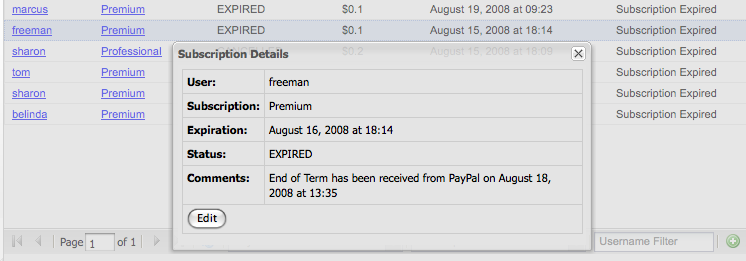
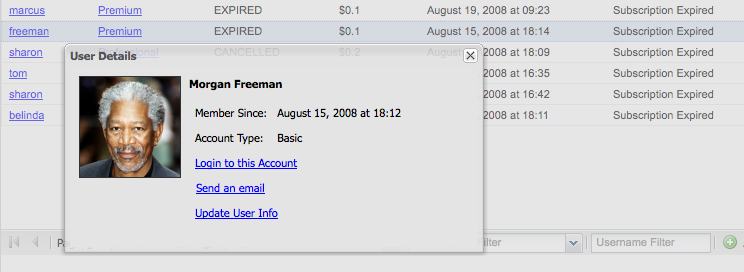
You can click on the link on the Subscription column to see further details about the subscription, such as expiration
date and you can also edit an existing subscription right from there.
Subscription status column can be PENDING, EXPIRED, ACTIVE or CANCELLED. Any status other than ACTIVE will disable
features available to that subscription type.
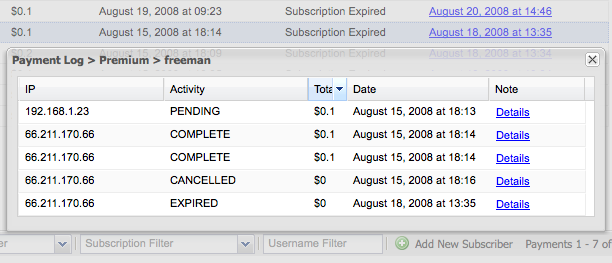
Last Payment and Last Payment Date columns will show the last time the user has made a payment. You can click on the
link on the last payment date to view a list of all payments the user has done.
In a similar fashion, Last Activity and Last Activity Date columns shows all activities including payment and
non-payment events. You can click on the link on Last Activity column to view a list of all activities for that user.
At the bottom of the payments report page, you will see three search tools that you can use to restrict the number of entries on the grid.
- Payment Status Filter
- Subscription Filter
- Username Filter
Memberkit Payment Reports is a simple but powerful tool that turns enormous amount of payment data into a usable single
drill-able listing.
Tags:
subscriptions profile
Related Articles:
 Add a new comment Add a new comment
|
Send Comment